Initial operation (LED F160)

-
Stelos 800 L
Stelos: Safety Instructions – read before use | Environment Stelos: Firmware update Stelos: User Interface | Controls | Functions | Handling Stelos: Technical Data Stelos: Remote control | Flash triggering Stelos: Power supply | Battery Stelos: Maintenance | Repair | Warranty Stelos: Accessories & Spare Parts Stelos: Error messages
-
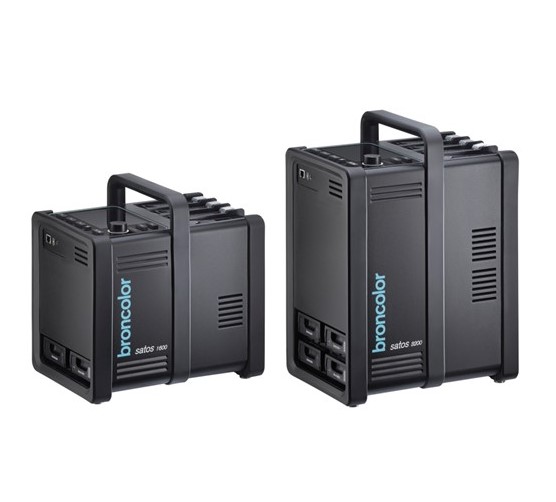
Satos
Satos: Safety Instructions – read before use | Environment Satos: Firmware update Satos Satos: User Interface | Controls | Functions | Handling Satos: Technical Data Satos: Remote control | Flash triggering Satos: Power supply | Battery Satos: Maintenance | Repair | Consumables | Spare parts | Guarantee Satos: Accessories Satos: Charging station for up to 4 slide-in batteries
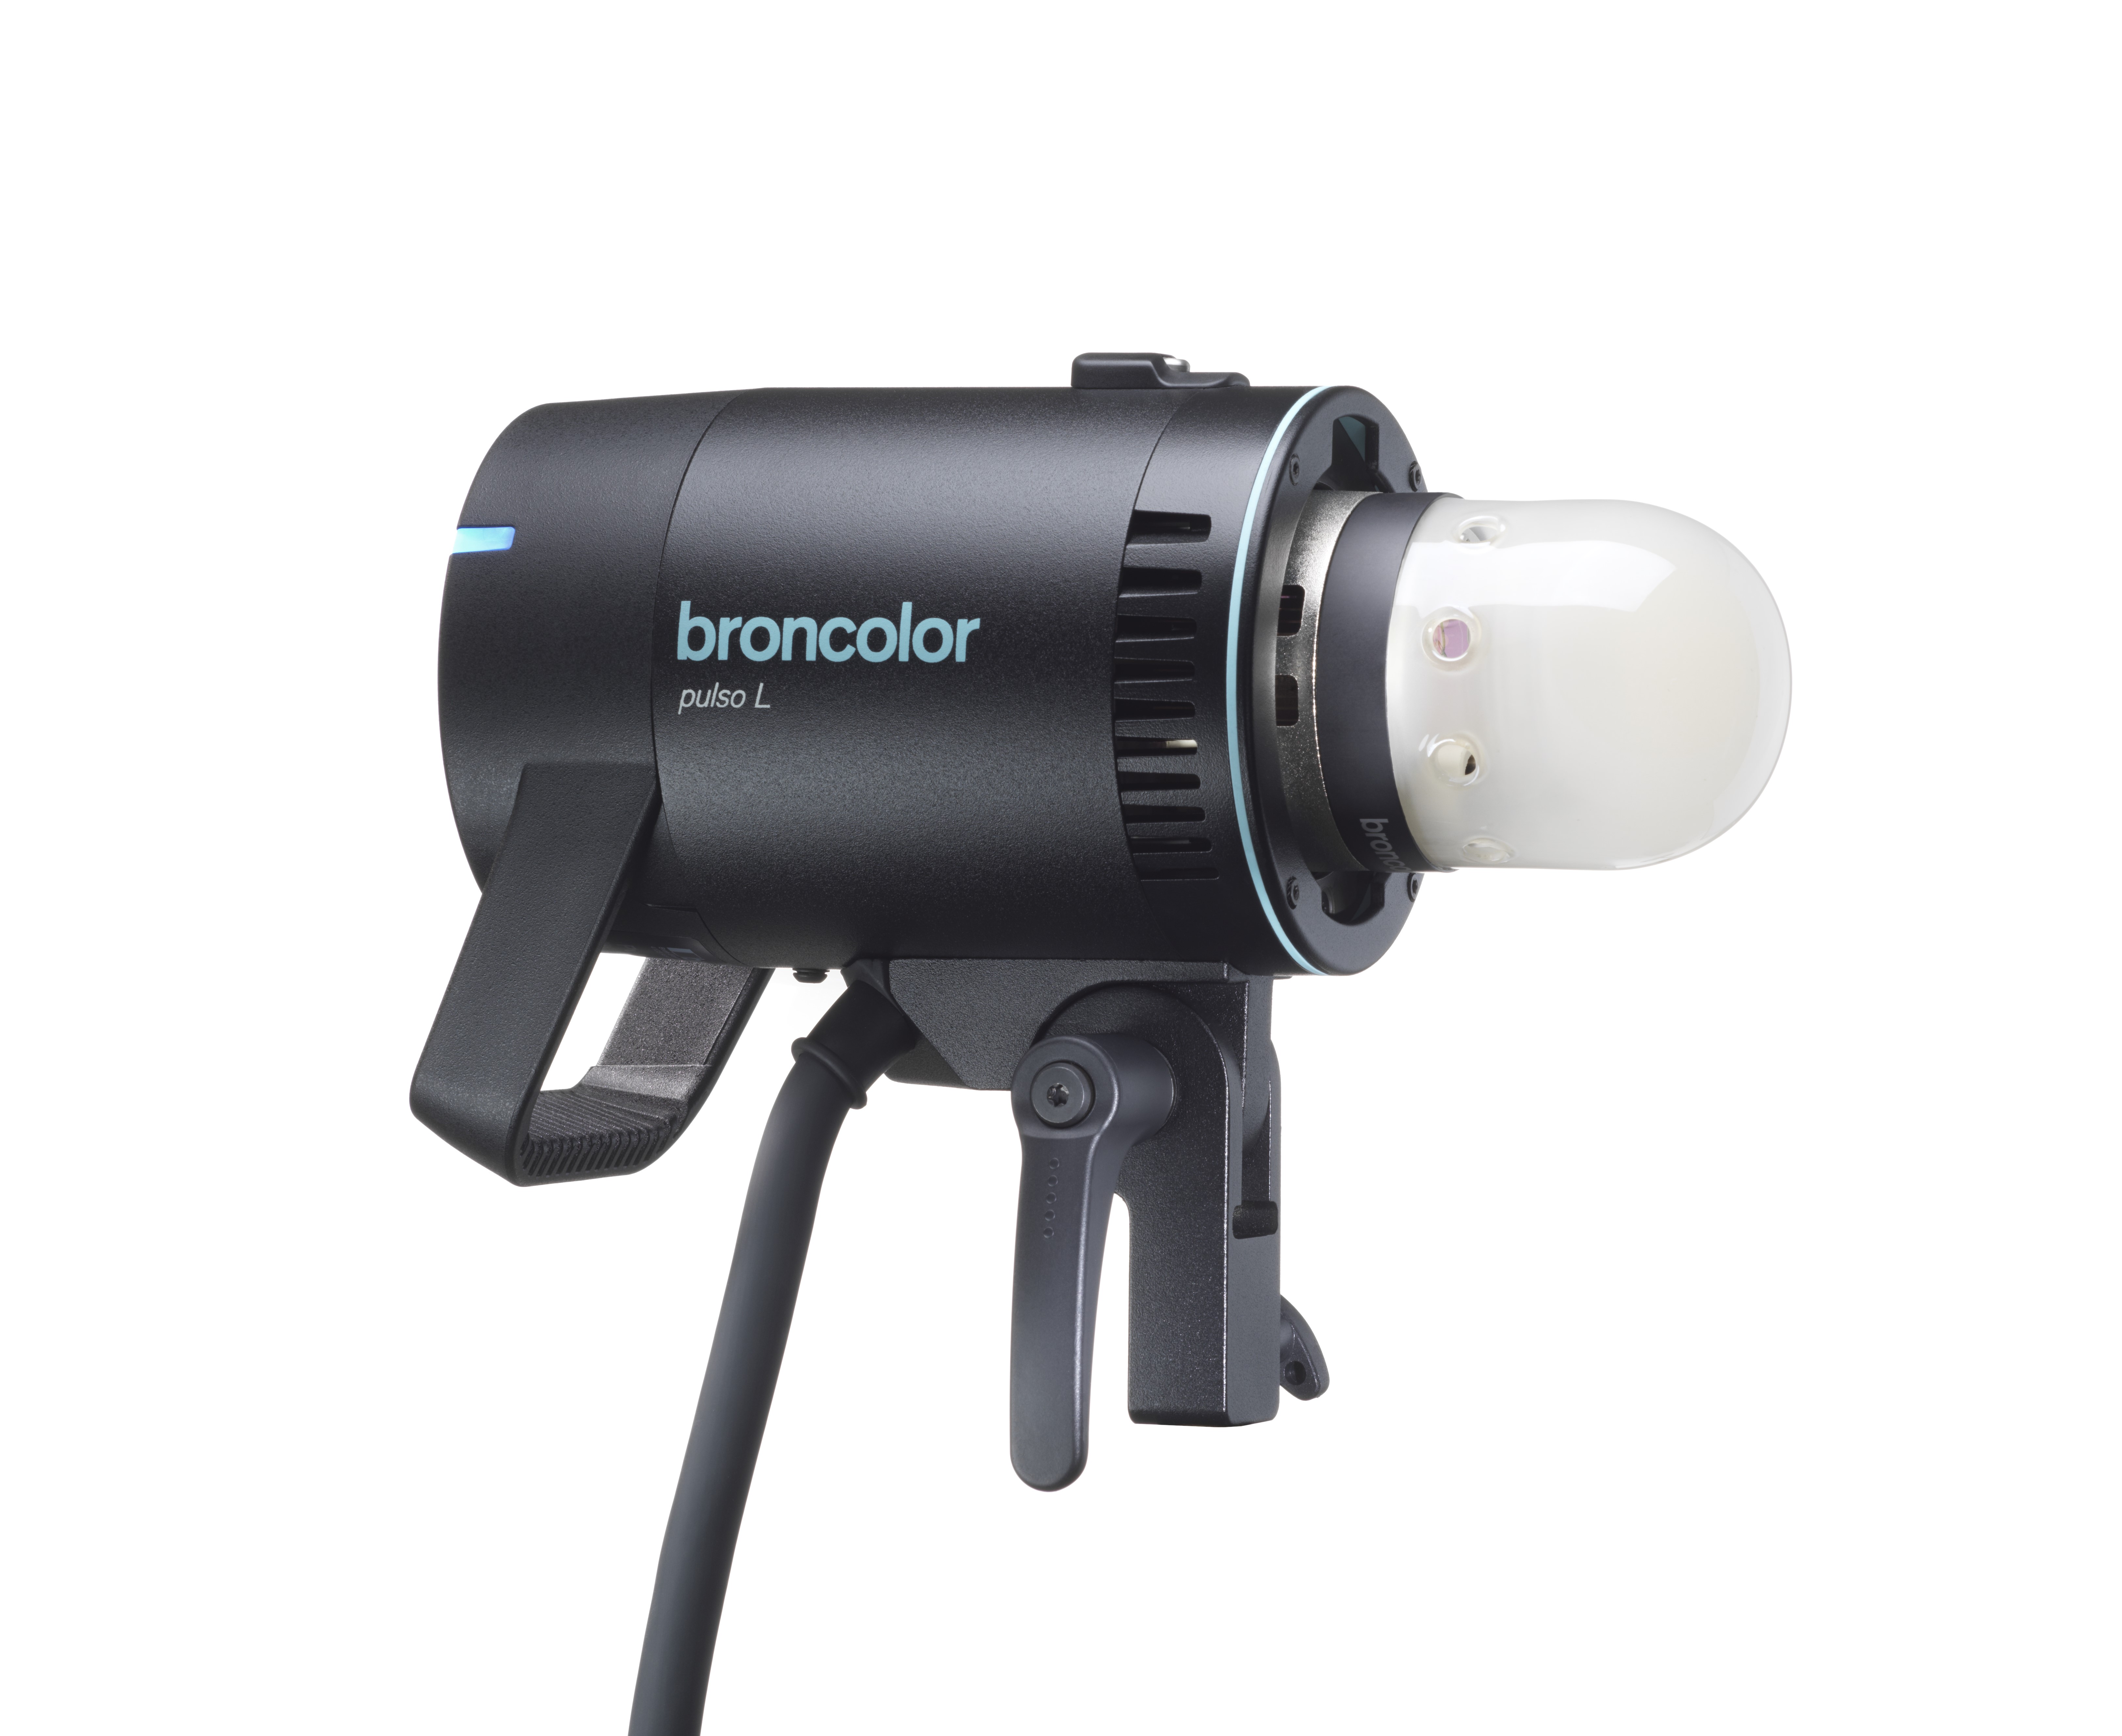
- Pulso L
-
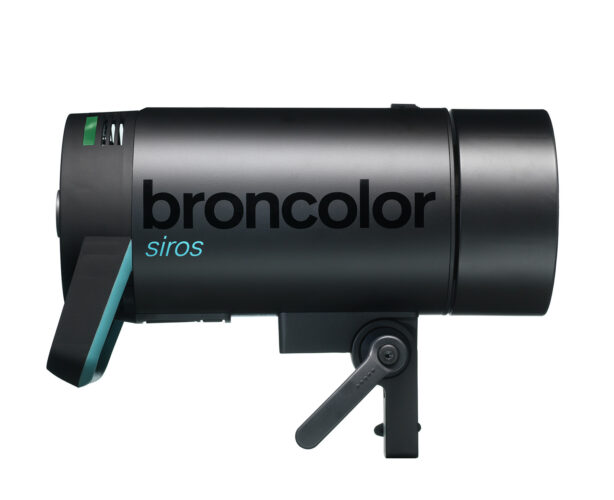
Siros S
Siros S: Safety Instructions – read before use | Environment Siros S: Firmware update Siros S: User Interface | Controls | Functions | Handling Siros S: Technical Data Siros S: Remote control | Flash triggering Siros S: Power supply Siros S: Maintenance | Repair | Consumables | Spare parts | Guarantee Siros S: Accessories
-
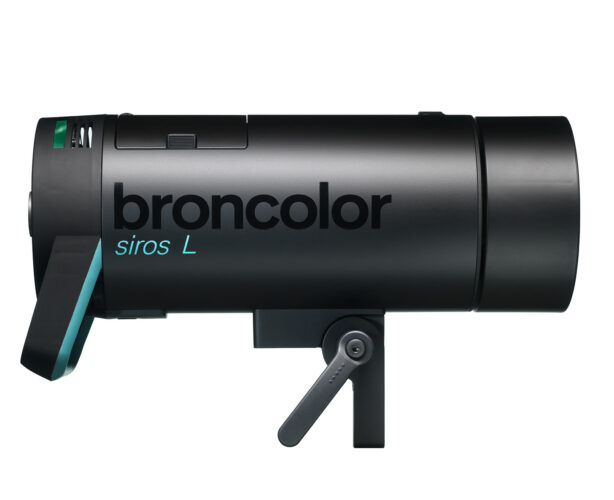
Siros L
Siros L: Safety Instructions – read before use | Environment Siros L: Firmware update Siros L Siros L: User Interface | Controls | Functions | Handling Siros L: Technical Data Siros L: Remote control | Flash triggering Siros L: Power supply | Battery Siros L: Maintenance | Repair | Consumables | Spare parts | Guarantee Siros L: Accessories
- Scoro E + S
- Move 1200 L
- RFS 2.1
- RFS 2.2
-
RFS 3
RFS 3: Safety Instructions – read before use | Environment RFS 3: Scope of delivery and operating elements RFS 3: User Interface | Controls | Functions | Handling RFS 3: Firmware Update RFS 3.0 RFS 3: Compatibility RFS 3: Technical Data RFS 3: Maintenance | Repair | Consumables | Spare parts | Guarantee RFS 3: Trouble shooting
- Pulso G, Unilite and Picolite
- LED F160
- Scope D50
- Compatibility (Lamp <-> light shaper | Lamp <-> power pack)
- Locate your distributor or dealer
-
 Stelos 800 L
-
 Satos
Satos
-
 Pulso L
-
 Siros S
-
 Siros L
-
 Scoro E + S
-
 Move 1200 L
-
 RFS 2.1
-
 RFS 2.2
-
 RFS 3
RFS 3
-
 Pulso G, Unilite and Picolite
-
 LED F160
-
 Scope D50
-
Compatibility (Lamp <-> light shaper | Lamp <-> power pack)
-
Locate your distributor or dealer
Table of Contents
The safety instructions provided must be observed!
Remove all protective transport materials and the black protective cover from the umbrella reflector before switching on the lamp.
Removing and Attaching light shapers
The LED F160 lamp is equipped with an innovative locking slider. By fixing it in the rearmost position, you now have both hands free to remove or replace the light shaper safely and in a controlled manner.
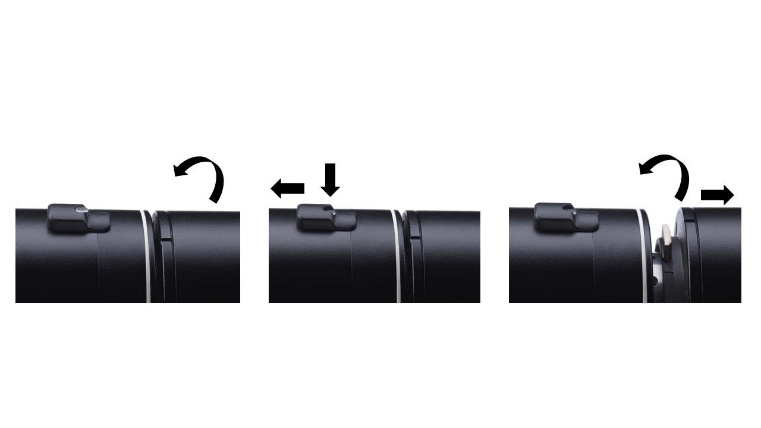
To remove the light shaper, rotate it as far as it will go in one direction. Pull the locking slider back as far as it will go with one finger and push the small locking pin down in the rearmost position. The slide will now remain in this position. Turn the reflector further in the same direction until it is unlocked. You can now remove it carefully. Please take care not to damage or scratch the diffusion attachment.
Attachment is also very simple:
Move the light shaper towards the LED F160 lamp from the front, align it with the bayonet recesses (small to small and large to large), push it back as far as it will go and then release the locking mechanism by turning it slightly to the left or right. You will hear a click. The light shaper is now securely attached.
Mounting an umbrella
If desired, insert the umbrella rod into the umbrella holder, which is located on the stand holder underneath the lamp.
Firstly, connect the pigtail of the LED F160 lamp to the cable permanently attached to the power supply unit.
Now connect the supplied power cable to the power supply unit.
Then plug the mains plug into a suitable socket.
The display illumination is now activated and the LED F160 lamp is ready for use
With a short press on the on/off button (![]() ), the LED lights up and can be switched off in the same way ("standby").
), the LED lights up and can be switched off in the same way ("standby").
Unplug the mains plug from the socket to switch off the device. The display only goes out completely once the power supply is interrupted. The mains plug is used as a disconnect device, the disconnect device shall remain readily operable.
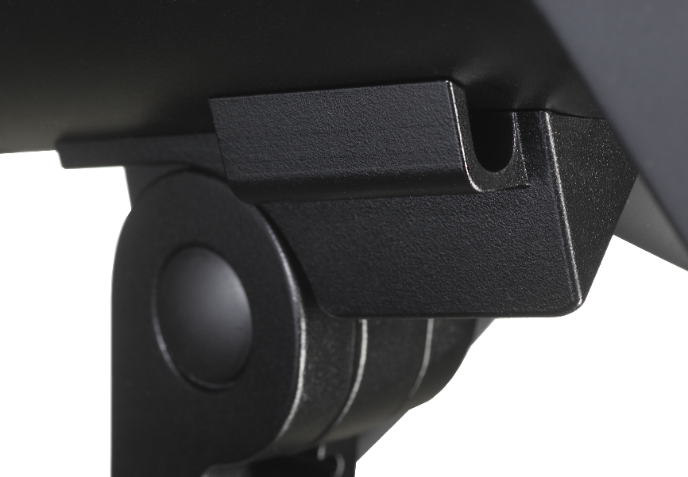
If desired, mount the LED F lamp on a suitable stand. The stand mount is located on the underside of the device.

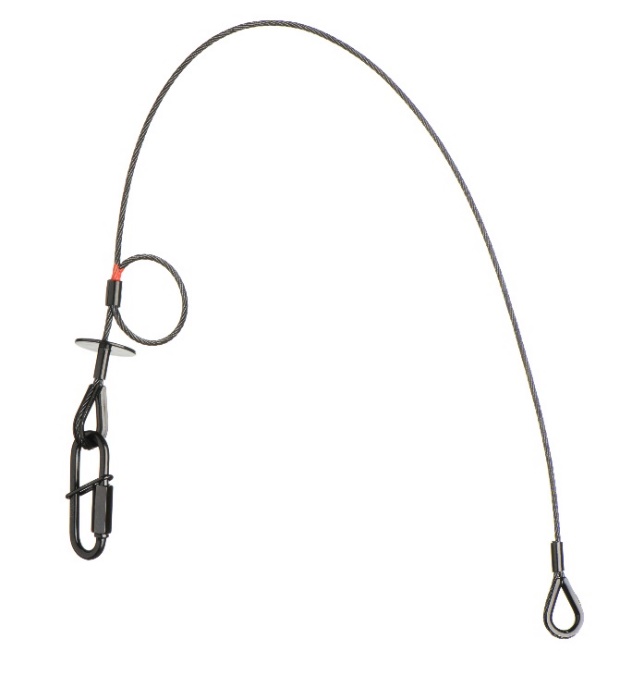
Warning
For ceiling installation, please observe the mounting instructions supplied with the accessory
"33.173.00 - Safety cable for LED F160 lamp", which is available separately.
The LED F160 lamp must NOT be mounted on the ceiling without the safety cable mentioned above!
The display of the LED F160 lamp has an automatic orientation. In overhead operation, the display automatically rotates by 180°.